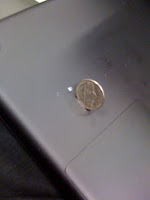
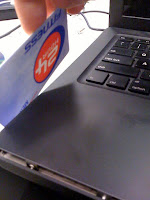
I recently have been having problems with my macbook's superdrive. It was making weird noises and at times, discs would not eject. Well today, it really flaked on me. It did not want to eject a CD I had just burned and everything I tried would not work. I tried several things I had read online about using credit cards, using CLI commands, holding down the mouse button during boot, reseting the PRAM... Nothing worked. There was very little sound coming from the drive and when I tried doing the credit card "trick" there was something blocking the card so I assumed that something was broken on the drive.
The computer is out of warranty. It was one of the 1st generation black macbooks. I decided to take it apart to remove the CD.
First thing I did was look online for information on removing the superdrive. There is A LOT of information. The guide I followed was from
http://fastmac.com/downloads/macbook_superdrive.pdf. It is really informative and I basically did everything exactly as the guide. I am posting this as another guide that hopefully will help you see things from different camera views. (Although my pictures came out really blurry)
First thing is first. Remove the battery, unplug the computer and make sure you don't hold a static charge. This is covered on the guide that I linked above.
Remove the L-bracket by loosening the screws and pulling the bracket carefully out.
Remove all of the external case screws. Make sure you remember which screws came from which parts of the case as they vary in size.
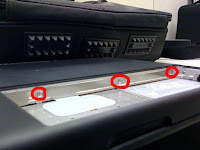
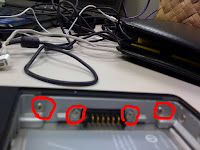
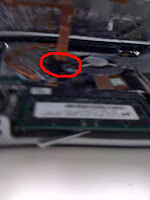
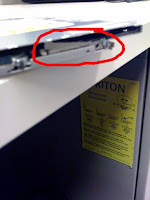
Next remove the screws indicated by the red circles in the following pictures.


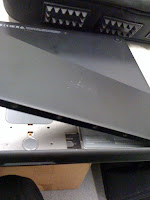
To remove the top case, use a card of some sort that is stiff enough to wedge into the side of the case. Carefully work your way around the case until top (keyboard/trackpad) case comes off. Be careful and watch for any snags or anything. If anything feels tight, you may need to double check if you missed any screws.
There will be a cable from the top case that is attached to the macbook's system board. Remove it with a flathead screwdriver.
Next move the bluetooth unit and move it away from the superdrive.
Remove the harddrive and screws holding the superdrive in place.
Remove the cable connecting the drive to the macbook's system board. Remove the EMI shield near the macbook's fan as well.

There is a cable that runs above the drive. Move the cable on the side so the drive can be removed.
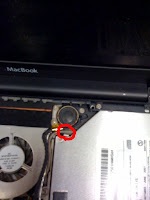
Near the fan, next to the superdrive, under where the EMI sheild was, there is a screw. It might be under some cables. Move the cables aside and remove the screw. The screw holds a bracket that needs to be slid towards the direction of the fan. You can use a flathead screwdriver to do that job.
You should be able to lift the drive out of the macbook now. If it does not want to cooperate, make sure you removed all of the screws and there aren't any cables blocking the drive.
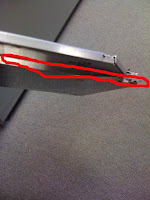
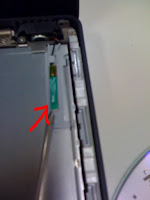
This is a picture of the bracket that you needed to slide out to remove the drive in the step above.
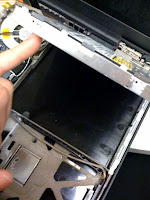
I was able to remove the CD that was stuck by moving this arm. That is what I was feeling when I was trying the credit card "trick." It seemed warped or something on my drive.
After removing the CD, I put everything back in the reverse order that I put it in. I tested the drive and it worked.... For now...
I will admit that this is one of the easiest laptops I have worked on. I don't have extensive experience in working with laptops, but with my limited knowledge and lack of tools, I was still able to get to the drive.


